|
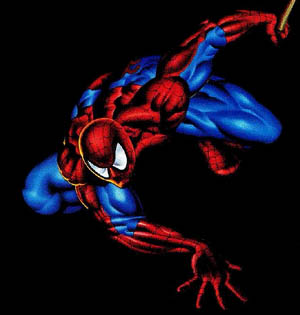
Picture from Marvel Comics
Home!
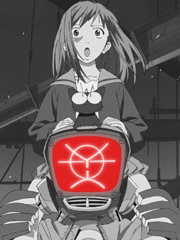
Picture from FLCL
Intermediate!
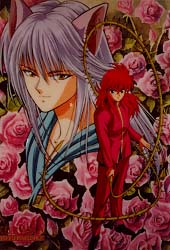
Picture from Funimation
Advanced!
Tips!
Picture from Capcom
Techniques!
Picture by Kelly X
Gallery!
E-mail
me!
|
ARE YOU READY FOR THIS ROOKIES?!?!?
This section tells the basics for drawing Superheroes and Anime. What
will be explained through here is how to start your characters with a
stickfigure skeleton, how to arrange that into a pose that shows some
sort of action, how to "pipe" the figure and form the "pipes"
into the characters muscles or figure and how to finally finish the basic
look of the character off. But, in order to know what you are drawing,
you must know the difference between Superhero and Anime drawings, which
can be seen in the pictures to the side. Spiderman, as you know, is a
superhero. Mamimi and Lord Conti (the girl and the robot below him) is
an example of Anime, as is Kurama and Yoko Kurama (the guy with the thorn
covered whip and the guy with fox ears against the rose background). Anyway,
this section, as I said, goes over the BASICS of Superhero and Anime drawing.
Shading and light effects (intermediate) will NOT be covered here, nor
will adding foreground and background(advanced).
Starting out: Stickfigure skeletons:
The basis of any character starts with the stick figure skeleton. This
determines the characters height, what they are doing in the picture,
and their build. With the skeleton, there are two important things to
remember. First: draw lightly. After you "pipe" the skeleton,
you'll be erasing it. Second: be sloppy! The skeleton doesn't need to
be neat. Draw and re-draw it until you get it in the exact shape you want.
Lesson 1: Drawing the skeleton.
Drawing a skeleton for your character is a simple task. They should not
be complicated, but simple, like the base figure shown below. To make
them look like they are engaging more, different curves of the spine and
body can be made so they look like they are doing something other than
standing around. Also, notice the little circles on the skeletons? These
are the joints, and it would be a wise idea to add them in so piping will
be easier.
Basic Figure :Showing Action: :Showing Action: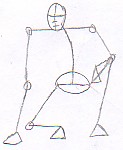
What a generic skeleton looks like. This shows different movement. Notice
how the spine plays part.
Lesson 2: Piping the skeleton.
Piping a skeleton means adding the basis for the characters figure. This
too is very simple. Make "pipes" around the sticfigure skeleton
like shown in the example below, erasing the skeleton afterwards. Like
i said before, make sure you drew the skeleton lightly and that you draw
the pipes lightly too. After you finish the set up of the pipes, you're
ready to move on to the point in which you start on the detail of the
figure. This may also be a good time to start adding in the basics for
the face and hair on the head of the character.
Piping the figure: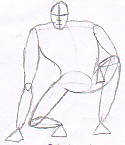
Piping a figure should look similar to this. After you've drawn the pipes
over the figure, erase the skeleton, you'll no longer be needing it.
TIP! Drawing long clothes: If you are drawing
a character with flowing, long clothing (i.e. a man in a long cloak or
a woman in a dress) then you still want to follow the first step for the
most part but include the flowing part as a simple shape (i.e. a large
rectangle for the mans cloak) and when you pipe it, pipe in the areas
where the clothing is long showing the points where along the sides and
ends the clothing curves.
Lesson 3: Finishing up.
After you've piped the character, connect their body together by erasing
the lines between pipes and adding in the skin, clothes and other basic
details. After you've done this, erase the pipes completely, and go over
the body again to finish it up. Draw the body lightly in the beginning
to repair errors and darken it when you are ready to erase the pipes.
Can you see how this Spec. Forces infiltrator developed from the skeleton
and pipes?
Finishing up:
Finishing up the basic figure is simply converting the pipes into the
final figure of the character. After doing this, you're ready to move
on to the Intermediate course of this site.
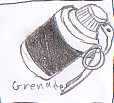
Special: Weaponry-Guns, Swords, Spears and Bows
Now that you've completed the beginners course, you are ready to start
the basics of a superb character. But, what is the whole idea behind him
or her? Well, that all depends on their look, and one thing that determines
their look is weaponry. Now, a good place to learn about basic guns (revolvers
and pistols) is Polykarbon.com in their tutorials section. Here, I'll
show you examples of different swords, spears, bows, guns and other weapons
(with names) and a few ways to make them unique. You'll be surprised as
to how much it can change the outcome of your character. Just note that
some of the designs aren't actually real designs from those versions of
the weapon.
 
 
|